What Is Standard Manuscript Format and Why It Matters
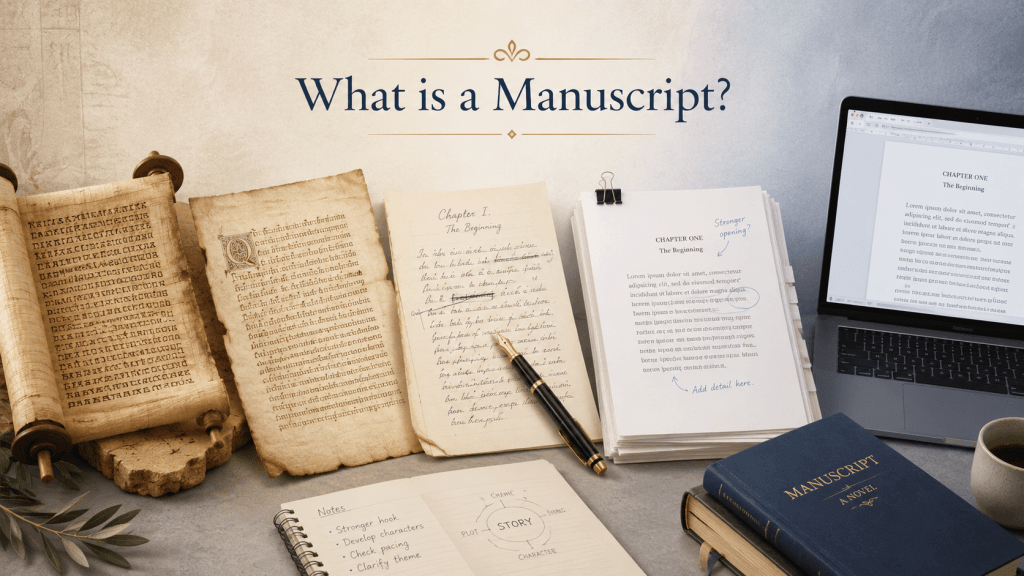
Standard manuscript format is the industry-recognized way of presenting a fiction manuscript before it lands on the desk of an editor or agent. It’s not about creativity or styling—it’s about consistency, professionalism, and readability. Below is a full breakdown of what it means and why every fiction writer needs to understand it before they submit their work.
What standard manuscript format actually is:
- Standard manuscript format is a set of formatting guidelines that dictate how your manuscript should look on the page—covering everything from font choice to spacing to margins.
- It was developed so that every manuscript submitted to editors and agents looks the same, regardless of who wrote it or what word processor was used to create it.
- The most widely referenced version of this format guide comes from William Shunn, whose formatting guide has become the go-to reference for fiction writers submitting short stories and novels alike. Many people simply refer to it as “the Shunn format” because of how influential his guide has been.
- Standard manuscript format isn’t a suggestion—it’s closer to an unspoken contract between writers and the publishing industry. When you follow it, you signal that you understand professional norms.
- This format applies to the entire manuscript, not just the opening chapter or a sample chapter. Every page, from the title page to the final line, needs to follow the same formatting guidelines.
Why standard manuscript format matters so much:
- Editors and agents read hundreds, sometimes thousands, of submissions a year. A manuscript that doesn’t follow standard manuscript format immediately looks unprofessional, even if the writing itself is strong.
- Proper manuscript formatting makes a document easier to read. Agents and editors are scanning quickly, often on tight deadlines, and a manuscript with strange fonts, inconsistent spacing, or missing page numbers is genuinely difficult to read.
- Word count estimates depend on standard formatting. Editors use formatting conventions (like assuming 250 words per page) to quickly estimate a manuscript’s length without counting every word. If your formatting doesn’t match those conventions, your word count estimate will be thrown off, which can create confusion about whether your novel fits a publisher’s requirements.
- Submission guidelines from literary agencies and publishing houses almost always assume you’re already familiar with standard manuscript format. Many submission guidelines don’t even bother explaining basic formatting because it’s assumed knowledge—so not knowing it puts you at an immediate disadvantage.
- It shows respect for the editor’s and agent’s time. A cleanly formatted manuscript that follows industry standards tells the reader, “I’ve done this before, or I’ve done my research,” which builds trust before they’ve even read your first sentence.
- It separates hobbyist writers from those ready for traditional publishing. Learning standard manuscript format is often one of the first real steps a fiction writer takes toward treating their writing as a professional pursuit rather than a personal project.
Common misconceptions about standard manuscript format:
- Some writers assume formatting doesn’t matter as long as the story is good. In reality, poor formatting can get a manuscript rejected before the story is even given a chance.
- Others believe standard manuscript format is overly rigid or old-fashioned because word processors have evolved. But the format persists because it’s about clarity and consistency, not aesthetics—it’s designed to look identical whether opened in Microsoft Word or any other word processor.
- Many new writers confuse the format of a published book with manuscript format. A published book has its own typesetting, layout, and design—very different from what your submission should look like. Manuscript format is meant to be simple, plain, and easy to edit, not a finished product.
- Some assume every publisher and agent has wildly different formatting guidelines. In truth, the vast majority follow the same simple guidelines rooted in standard manuscript format, with only minor variations (like specific font requests) between them.
Where standard manuscript format comes from:
- It has roots in the days of typewriters, when uniformity was necessary for editors to physically mark up pages, estimate word count, and send manuscripts to typesetters.
- Even though nearly everyone now writes using a word processor instead of a typewriter, the formatting guide has remained largely unchanged because it still solves the same problems: readability, consistent word count estimates, and ease of editing.
- Modern versions of the format guide, like Shunn’s, simply adapted the original typewriter-based rules for the word processor era, keeping the core principles the same while updating for modern software like Microsoft Word.
Understanding standard manuscript format is really about understanding what editors and agents expect to see before they’ve read a single word of your story. It’s a foundational skill—and once you learn it, formatting your manuscript becomes second nature for every future submission.
Sections of a Scientific Manuscript: A Standard Manuscript Format Overview
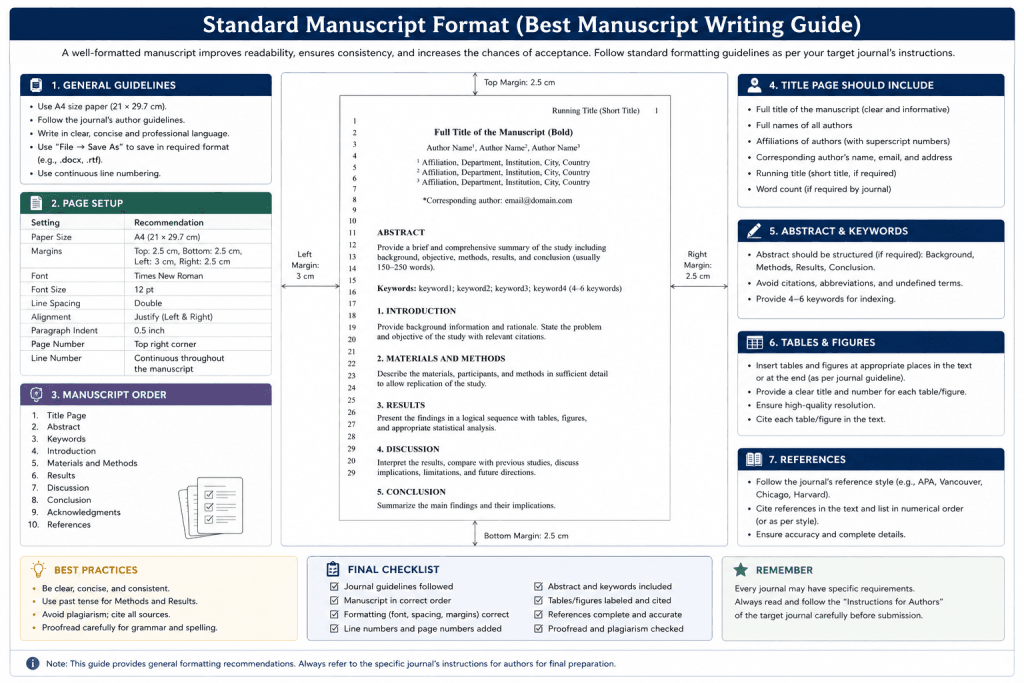
While standard manuscript format for fiction focuses on font, spacing, and page layout, a scientific manuscript follows a completely different structure built around presenting research clearly and logically. Here’s a breakdown of the sections editors and reviewers expect to see.
Title Page
- Includes the full title of the paper, author names, affiliations, and corresponding author contact details.
- Often includes a running header (a shortened version of the title) in the top right corner or top left corner, along with a page number, similar in function to the header used in a fiction manuscript.
- May also include keywords relevant to the research, which help with indexing and searchability once published.
Abstract
- A concise summary (usually 150–300 words) of the entire manuscript, covering the purpose, methods, results, and conclusion of the study.
- Written to stand alone, since many readers will only read the abstract rather than the entire manuscript.
Introduction
- Establishes the background and context of the research, explaining why the study matters and what gap in existing knowledge it addresses.
- Ends with a clear statement of the research question, hypothesis, or objective.
Methods (or Materials and Methods)
- Describes exactly how the research was conducted, including procedures, tools, participants, or materials used.
- Written with enough detail that another researcher could reasonably replicate the study using this section alone.
Results
- Presents the findings of the study, often supported by tables, charts, or figures, without interpreting what the findings mean yet.
- Organized logically, usually following the same order as the research questions or hypotheses introduced earlier.
Discussion
- Interprets the results, explaining what the findings mean in the context of the original research question.
- Addresses limitations of the study and often suggests directions for future research.
Conclusion
- A brief closing section that summarizes the key takeaways of the manuscript and reinforces its overall significance.
- Sometimes combined with the discussion section, depending on specific submission guidelines from the journal.
References (or Works Cited)
- Lists every source cited throughout the manuscript, formatted according to the specific citation style required by the journal (APA, MLA, Chicago, or another format).
- Falls at the very end of your manuscript, after all other sections are complete.
Appendices and Supplementary Material
- Includes additional data, extended tables, or supporting material that isn’t essential to the main manuscript but supports the research.
- Placed after the references, and often submitted as a separate file depending on the journal’s submission guidelines.
Just like fiction writers need to understand standard manuscript format before submitting to agents and editors, researchers need to follow the accepted structure of a scientific manuscript before submitting to a journal—since both are judged, in part, on how well they follow the formatting guidelines their industry expects.
Setting Up Your Title Page and Header in Standard Manuscript Format
Your title page and header are the very first things an editor or agent sees, so getting them right is essential to proper manuscript formatting. Here’s exactly how to set them up.
Title page essentials:
- The title page is the first page of your manuscript and should be treated as front matter, separate from your actual story pages.
- In the left corner (top left-hand side) of your title page, include your author name, address, phone number, and email address, stacked in single-spaced lines.
- In the right corner (top right-hand side), include your approximate word count, rounded to the nearest hundred or thousand, since editors use this for quick estimation rather than an exact count.
- Roughly halfway down the page, center your book’s title in all capital letters, with “by” and your author name (or pen name) beneath it.
- Do not include a table of contents, ISBN, or cover art on your title page—these belong in the front matter of a published book, not in a submission manuscript.
- Your title page does not get a header or a page number, since it’s considered separate from the numbered body of the manuscript.
- Keep the title page simple. Fancy fonts, decorative borders, or colored text have no place here—stick to the same font as the rest of your manuscript.
Setting up your header:
- Starting on the first page of Chapter One (not the title page), every subsequent page needs a header in the top right corner.
- The standard header includes your last name, a keyword from your title, and the page number—for example: “Smith / Nightfall / 2.”
- This header exists so that if pages become separated, an editor can quickly identify whose manuscript it is and what page it belongs to.
- Word processors like Microsoft Word let you insert an automatic header and page number function, which will apply to every page and update automatically, so you never need to type it manually per page.
- Make sure your header uses the same font as the rest of your manuscript—no exceptions, even though it’s a small, functional detail.
- Avoid placing anything in the header on your title page or on the very first page of your first chapter, since the first page typically only needs the page number to begin, depending on the specific submission guidelines of the agent or publisher.
Formatting the first page of Chapter One:
- Drop down about a third of the way onto the first page and center your chapter number and chapter title before beginning your story.
- Some formatting guides also recommend an extra line of space between the chapter title and the first paragraph, giving the opening a clean, deliberate look.
- The first line of your first paragraph can be formatted without an indent, following certain style preferences, though many guides simply keep it consistent with every other paragraph indent throughout your manuscript.
Getting your title page and header right sets the tone immediately, showing editors and agents that you understand standard manuscript format from the very first page.
Font, Font Size, and Times New Roman Requirements
Font choice feels like a small detail, but it’s one of the most talked-about elements of standard manuscript format. Here’s what you need to know about setting your font correctly.
Choosing the right typeface:
- The most widely accepted font for standard manuscript format is Times New Roman, a serif typeface known for being clean, professional, and easy to read across both print and digital formats.
- Use a 12 point font size for your entire manuscript. This size has become the unofficial standard because it strikes the right balance between readability and standard page-to-word-count ratios.
- Serif fonts, like Times New Roman, have small lines or “feet” at the ends of letters, which many believe makes long blocks of text easier to read—especially important when an editor is reading hundreds of pages.
- Sans serif fonts (fonts without those small decorative strokes) are typically discouraged for manuscript submissions. While sans serif fonts can look modern and clean on a screen or in a title header, they are not considered standard for full-length fiction submissions.
- Courier, and specifically Courier New, is sometimes requested by certain publishers or agents instead of Times New Roman, since Courier is a monospaced font that mimics old typewriter text and makes word count estimates more visually predictable. However, unless specifically requested, Times New Roman remains the default choice.
Why font choice matters so much:
- A manuscript in an unusual or decorative font can come across as amateurish and, more importantly, can be genuinely difficult to read over long stretches.
- Editors and agents are used to scanning manuscripts in Times New Roman or Courier New, so anything else disrupts their reading rhythm and can create an unconscious bias against the manuscript before the story is even considered.
- Using a consistent typeface throughout your entire manuscript also matters for word count estimates and page-count expectations that agents and publishers rely on.
How to set your font correctly:
- Before typing a single word, set your font size and typeface first in your word processor, whether that’s Microsoft Word, Google Docs, or Scrivener, so you’re not stuck reformatting the entire manuscript later.
- Highlight your entire manuscript (Ctrl+A or Cmd+A) and reapply Times New Roman at 12 point font size if you’ve written large sections in a different font or copied text from another source.
- Double-check that headers, chapter titles, and body text are all in the same typeface, since inconsistent fonts between sections is a common formatting mistake.
- Avoid switching fonts for emphasis. Instead of changing typeface for emphasis or internal thoughts, italics (not bold, not a different font) should be used, which we’ll cover more in later sections.
- If specific submission guidelines request a different font, such as Courier, always follow those guidelines over the general standard, since individual publishers and agents sometimes have their own preferences.
Following these simple guidelines for font consistency is one of the easiest ways to instantly make your manuscript look professional and aligned with industry standards.
Paragraph Spacing, Double Space, and Word Count Guidelines
Spacing is where many new writers get tripped up, since word processors often default to settings that don’t match standard manuscript format. Here’s exactly how to fix that.
Double-spacing your manuscript:
- Your entire manuscript should be double-spaced, meaning there is a full blank line of space between each line of text.
- Double space (or double-spaced lines) makes it much easier for an editor to read quickly and to insert handwritten notes or edits between the lines if needed.
- In Microsoft Word or another word processor, go to your line spacing settings and select “2.0” or “Double” rather than manually hitting the space bar or enter key between lines, since manual spacing creates inconsistent results.
- Never use the space bar to fake spacing between lines. All spacing should be controlled through your word processor’s built-in line spacing tool for consistency across the entire manuscript.
Paragraph indents done correctly:
- Every new paragraph should begin with a paragraph indent of about half an inch, applied using the “first line indent” setting in your word processor rather than manually hitting tab or space bar multiple times.
- The first line of each paragraph needs this indent—this is a hallmark of proper manuscript formatting and instantly signals a professional approach.
- Do not add extra space between paragraphs. Since your manuscript is already double-spaced, adding an additional blank line between paragraphs creates uneven, inconsistent spacing down the page.
- The only paragraph that skips the first line indent is often the very first paragraph of a new chapter or after a scene break, depending on specific formatting guidelines you’re following.
Margins and page setup:
- Set one-inch margins on all four sides of every page—top, bottom, left, and right—since this is a firm expectation across almost all submission guidelines.
- One-inch margins keep line lengths consistent, which supports accurate word count estimates and gives editors a uniform reading experience from manuscript to manuscript.
- Do not justify your text (aligning both left and right edges evenly). Left-align your text only, since justified text can create unnatural spacing gaps between words.
Word count and page count guidelines:
- Standard manuscript format assumes an estimate of roughly 250 words per page, which is why one-inch margins, 12 point font, and double-spacing all work together to create that predictable ratio.
- Your approximate word count (not your exact word count) goes on the title page, rounded to the nearest hundred or thousand depending on your manuscript’s length.
- Editors rely on this page-to-word ratio to quickly gauge whether your manuscript fits within a publisher’s typical length requirements for the genre, so accurate formatting directly affects this evaluation.
- Word count guidelines vary by genre, but sticking to standard manuscript format ensures your estimate is calculated the same way editors expect, avoiding any confusion about your manuscript’s real length.
Getting spacing, indents, and margins right isn’t glamorous, but it’s foundational to formatting your manuscript in a way editors and agents immediately recognize and trust.
Using Scene Breaks, Asterisks, and Page Breaks Correctly
Scene breaks and page breaks are small formatting details that often get overlooked, but they play a big role in guiding the reader through your story. Here’s how to handle each one correctly.
What a scene break is and when to use one:
- A scene break signals a shift in time, location, or point of view within the same chapter, without starting an entirely new chapter.
- Common triggers for a scene break include a jump forward in time, a change in setting, or a shift to a different character’s perspective.
- Scene breaks help readers—and editors—understand that something has changed without needing an explicit transition sentence to explain it.
How to format a scene break:
- The standard way to indicate a new scene is to insert a blank line, then center a single asterisk on its own line, followed by another blank line before continuing with the next paragraph.
- Some formatting guides recommend three asterisks spaced apart (like “* * *”) instead of just one, so it’s worth checking specific submission guidelines from the agent or publisher you’re submitting to, since preferences can vary slightly.
- Never use a full page break for a scene break within the same chapter—a page break is reserved for chapter transitions, not scene transitions, which we’ll cover next.
- Avoid using symbols other than asterisks, like dashes, tildes, or decorative dividers, since asterisks are the industry standard recognized across submission guidelines.
- After the asterisk (or set of asterisks), the first line indent rule still applies. Format the paragraph immediately following a scene break the same way you’d format the first paragraph after a chapter break.
Understanding page breaks and when to use them:
- A page break forces your word processor to move directly to a new page, which should be used specifically at the end of a chapter, right before a new chapter begins.
- In Microsoft Word, this is done using the “Insert Page Break” function rather than pressing “Enter” repeatedly until you reach a new page, since manually created space can shift unpredictably if edits are made later.
- Every chapter should begin on a new page. This means after the end of one chapter, you insert a page break so the next chapter number and chapter title start fresh at the top of the next page.
- This applies consistently throughout the entire manuscript, from beginning of each chapter all the way to the end of your manuscript, keeping every chapter transition uniform.
Common mistakes with scene breaks and page breaks:
- Using extra blank lines instead of an actual page break can cause formatting to shift if the manuscript is opened on a different word processor or device, creating unpredictable gaps.
- Forgetting to include a scene break entirely when jumping between times or perspectives can confuse readers and editors, making the story feel disjointed or poorly edited.
- Overusing scene breaks for very minor transitions can fragment your story unnecessarily; they should be reserved for meaningful shifts, not simply new paragraphs.
- Mixing formatting styles (using both a page break and an asterisk scene break for the same transition) creates inconsistency across the manuscript and should be avoided.
Why these small details matter:
- Scene breaks and page breaks might seem like minor formatting choices, but they directly affect how easy your manuscript is to read and follow.
- Editors and agents notice when scene breaks and page breaks are used inconsistently, since it suggests the writer hasn’t fully internalized standard manuscript format.
- Following these simple guidelines consistently across your entire manuscript reinforces the professional, polished impression you want to make with every submission.
Mastering scene breaks, asterisks, and page breaks is a small but meaningful step in formatting your manuscript the way editors and agents expect to see it.
Standard Manuscript Format Checklist for Typesetting and Submission
Before you submit your manuscript, it helps to run through a full checklist to make sure everything aligns with standard manuscript format. Here’s a comprehensive breakdown to use as your final review before hitting send.
Title page and front matter checklist:
- Author name, address, phone number, and email in the left-hand corner of the title page.
- Approximate word count in the top right corner of the title page.
- Book title centered in capital letters roughly halfway down the page, with “by” and author name beneath it.
- No table of contents, ISBN, or extra front matter included, since this belongs in a published book, not a submission manuscript.
- Title page left without a header or page number, since numbering begins with Chapter One.
Font and typeface checklist:
- Times New Roman (or Courier New if specifically requested) used consistently across the entire manuscript.
- 12 point font size applied throughout, with no variation between chapters, headers, or the title page.
- No sans serif fonts used anywhere in the body text, headers, or chapter titles.
- Emphasis handled through italics only, never through bold text, underlining, or a different typeface.
Spacing and layout checklist:
- Entire manuscript double-spaced using your word processor’s line spacing tool, not manual spacing.
- Paragraph indents applied to the first line of every paragraph using the first-line indent setting, not the tab key or space bar.
- One-inch margins set on all four sides of every page.
- Text left-aligned only, never justified.
- No extra blank lines added between paragraphs.
Header and page number checklist:
- Header in the top right corner of every page starting with Chapter One, formatted as: last name / keyword from title / page number.
- Automatic page numbering used through your word processor rather than manually typed numbers.
- Consistent font used in the header, matching the rest of the manuscript.
Chapter and scene formatting checklist:
- Each new chapter begins on a new page, using an actual page break rather than manual spacing.
- Chapter number and chapter title centered about a third of the way down the first page of each chapter.
- Scene breaks marked with a centered asterisk (or set of asterisks, depending on submission guidelines), never a page break.
- Consistent formatting used for every scene break and chapter transition across the entire manuscript.
Final review checklist before submission:
- Read through submission guidelines for each individual agent or publisher, since some may request slight variations from general standard manuscript format—always follow their specific instructions over generic best practices.
- Confirm your word count is accurate and reasonably estimated based on the 250 words per page ratio.
- Check that your manuscript doesn’t include any unnecessary typesetting elements meant for a published book, like drop caps, decorative chapter headers, or fancy typesetting flourishes—your manuscript should remain plain and functional.
- Proofread your formatting from the first page to the very end of your manuscript, checking for consistency in font, spacing, indents, and headers throughout.
- Save your file in the format requested by the submission guidelines, whether that’s a Word document, PDF, or another format specified by the agent or publisher.
- If a free template is available from a trusted formatting guide (like Shunn’s formatting guide), consider using it as a base to double-check your own manuscript against a proven, industry-recognized structure.
Why running through this checklist matters:
- A single formatting inconsistency might not sink your submission on its own, but multiple small errors together can create an impression of carelessness that works against you.
- Editors and agents are more likely to take a manuscript seriously when it’s clear the writer understands and follows industry standards without needing guidance.
- This checklist isn’t just for your first submission—reuse it every time you submit a new manuscript, since formatting expectations remain consistent across most agents and publishers in the fiction space.
Running through this full checklist before every submission ensures your manuscript is ready to make the best possible first impression, giving your story the strongest chance of catching the attention of the editors and agents you’re hoping to work with.
- Purdue University Online Writing Lab (OWL) – Research and Manuscript Writing Resources – https://owl.purdue.edu/owl/research_and_citation/resources.html
- University of Washington Writing Center – Academic Writing and Research Papers Guide – https://www.writingcenter.uw.edu/
- Massachusetts Institute of Technology (MIT) Writing and Communication Center – Scientific and Academic Writing Support – https://writing.mit.edu/wcc