What Is Novel Manuscript Format and Why It Matters
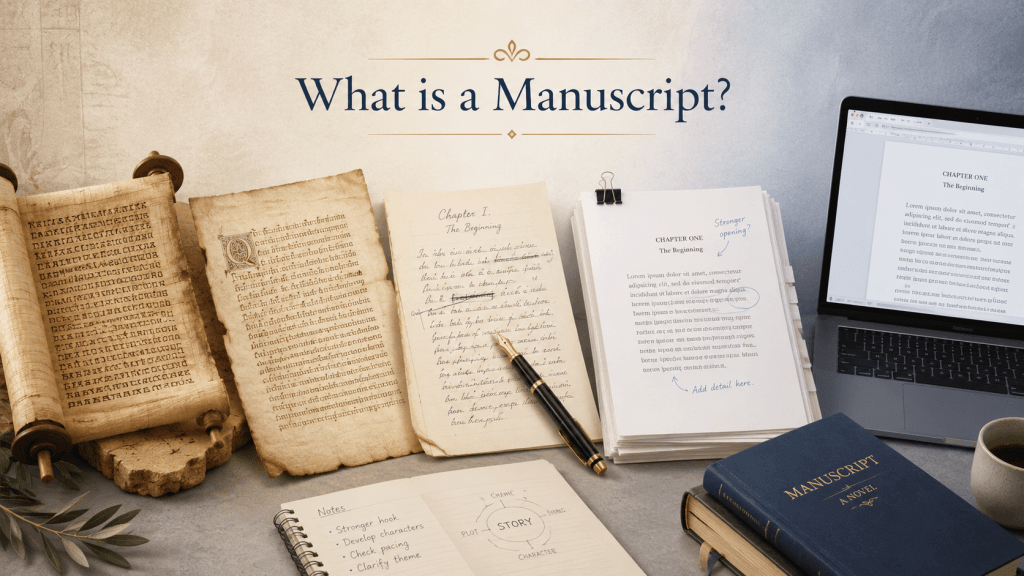
- Novel manuscript format is the set of rules writers follow to present their work before it becomes a published book. Before your story ever reaches a bookstore shelf, it exists as a manuscript — a raw, unpublished document that agents, editors, and publishers need to read, mark up, and evaluate. Novel manuscript format exists to make that process smooth, consistent, and professional.
- Think of it as the “packaging” of your story. A brilliant novel wrapped in messy, inconsistent formatting can get overlooked simply because it’s difficult to read.
- Standard format isn’t about creativity — it’s about function. It strips away distractions so the words themselves take center stage.
- Why does manuscript format matter so much in the publishing world?
- Literary agents and editors read hundreds of submissions a month. A properly formatted manuscript signals that you understand industry norms and have done your homework.
- Formatting inconsistencies (odd fonts, missing page numbers, no double-spacing) can make a manuscript seem amateurish before an agent even reaches page two.
- Following the accepted novel manuscript format also makes editing easier — for you and for anyone else who touches the file, including copyeditors and proofreaders.
- Manuscript format is different from a published book’s format.
- A finished, published book is typeset — meaning it’s been professionally designed with custom fonts, chapter styling, and layout choices meant for print or e-readers.
- A manuscript, by contrast, uses a plain, uniform novel manuscript format specifically so it can be read quickly and edited without visual distraction.
- Confusing the two is one of the most common mistakes new writers make — formatting your manuscript like a finished book actually works against you during the submission stage.
- What happens when a manuscript doesn’t follow standard format?
- Some agents and editors will reject a submission outright if it ignores basic formatting guidelines, regardless of how strong the writing is.
- Improper formatting can also make your word count estimate inaccurate, which affects how your novel is evaluated for genre expectations.
- In short, learning novel manuscript format isn’t optional if you’re serious about traditional publishing — and it still matters even if you plan to self-publish, since a clean manuscript format makes the later typesetting stage far easier.
- The bottom line: novel manuscript format is the invisible framework that lets your story be judged on its merits. Once you understand the basic expectations, formatting your manuscript becomes second nature, and you’ll be able to focus on what really matters — the writing itself.

Standard Format Basics: Font, Double Space, and Paragraph Rules
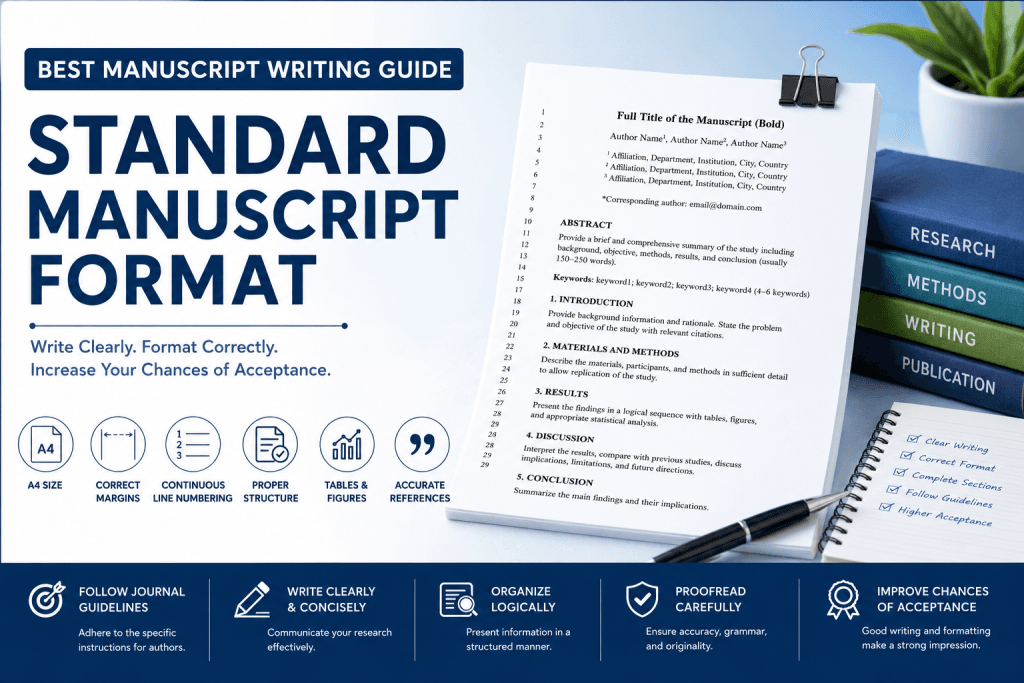
Understanding the standard format for a novel manuscript starts with a handful of core technical choices. These aren’t arbitrary — each one exists to make your manuscript format easier to read, edit, and process.
- Choose the right font.
- The gold standard for novel manuscript format is a serif font — most commonly Times New Roman, sometimes Courier New.
- Serif fonts (fonts with small decorative strokes at the ends of letters) are easier on the eyes across long stretches of text, which is exactly what agents and editors are dealing with when they read a full-length manuscript.
- Avoid sans serif fonts (like Arial or Calibri) for the body of your manuscript. While sans serif fonts look clean on a screen, they’re not considered standard format for fiction submissions and can make your manuscript look unconventional.
- Courier New was historically the go-to because it’s a monospace font, useful for estimating page count accurately, but Times New Roman has become the more widely accepted default in modern submission guidelines.
- Set the correct font size.
- 12 point is the industry standard for novel manuscript format. Anything smaller strains the reader’s eyes; anything larger looks unprofessional or like you’re padding your page count.
- Keep font size consistent throughout your entire manuscript — including chapter titles, unless a slightly larger size (like 14 or 16 point) is used deliberately for chapter headings.
- Double-space everything.
- Your entire manuscript should be double-spaced — every page, from the first line of chapter one to the final line at the end of your manuscript.
- Double spacing (or double-spacing, depending on how you phrase it) gives editors room to add comments, track changes, or make notes directly on a printed page.
- Never manually add space by hitting enter twice between lines. Use your word processor’s built-in line spacing setting instead — in Microsoft Word, this is found under Paragraph settings, where you select “Double” from the line spacing menu.
- Avoid adding an extra line between paragraphs unless you’re indicating a scene break (more on that shortly). A blank line between every paragraph is not standard format and disrupts the natural flow of double-spaced text.
- Use proper paragraph indentation.
- The first line of every paragraph should be indented — typically by 0.5 inches, which is the default indent setting in most word processors.
- Never use the space bar or multiple taps of the tab key to create your indentation. This creates inconsistent spacing that looks messy and can cause formatting errors when the file is opened on a different device or converted to another file type.
- Instead, set a proper first-line indent through your paragraph formatting menu. In a Word document, this means adjusting the “Special” indentation setting to “First Line” and setting it at 0.5 inches.
- There should be no extra space between paragraphs in standard novel manuscript format — the indentation alone is what signals a new paragraph, not an added blank line or extra space.
- Skip the extra space after periods.
- Older typing conventions taught two spaces after a period, a holdover from typewriter days. Modern standard format calls for one space after a period, not two.
- This is a small detail, but it’s one of those formatting guidelines that agents and editors notice, especially since most modern word processors and typesetting software automatically flag or strip the extra space anyway.
- Set your margins.
- One-inch margins on all sides (top, bottom, left, and right) is the accepted standard format for a novel manuscript.
- Consistent margins keep your page count accurate and your manuscript easy to read whether it’s viewed on screen or printed out.
Getting these basics right — font, font size, double space, indentation, and margins — forms the backbone of proper novel manuscript format. Once these are set correctly at the start, they’ll apply automatically to your entire manuscript, saving you from having to fix formatting issues later.
Title Page and Word Count: Setting Up Your Manuscript Format
Before an agent or editor even reaches your first page of actual story, they’ll see your title page. Getting this part of your novel manuscript format right sets the tone for everything that follows, and it’s often the first real test of whether you understand novel manuscript format at all.
- What belongs on the title page.
- Your title page is essentially the front matter of your manuscript, and it should include a specific, standardized set of information:
- Author name — your real name (or legal name), not necessarily your pen name, placed in the upper left corner of the page.
- Contact information — address, phone number, and email, typically listed just below your name.
- Word count — placed in the upper right corner, rounded to the nearest thousand (for example, 82,000 words, not 81,743).
- Novel title — centered, roughly halfway down the page, usually in a larger font size or in all caps.
- Genre — some submission guidelines ask you to note the genre directly beneath the novel title.
- Note that the title page is the one page in your entire manuscript where centered text and varied placement are acceptable — everywhere else, standard format calls for left-hand alignment.
- Your title page is essentially the front matter of your manuscript, and it should include a specific, standardized set of information:
- Why word count matters so much.
- Word count tells an agent or editor whether your manuscript fits typical expectations for your genre. A literary agent representing thrillers, for instance, expects a very different word count range than one representing epic fantasy.
- Always round your word count to the nearest thousand — exact counts (like 79,532) look overly precise and can actually raise questions rather than answer them.
- Most word processors calculate this for you automatically; in a Word document, you’ll find the word count tool under the Review tab.
- No page number on the title page.
- While every other page of your manuscript needs a page number, the title page itself is the exception — it remains unnumbered.
- Page numbering typically begins on the first page of chapter one, or sometimes on the second page if a separate half-title or table of contents page is included (though a table of contents is not standard for fiction submissions and is generally reserved for the published book stage).
- Formatting the first page of your manuscript.
- Your first page should begin partway down the page (often a third of the way down), with your chapter title or “Chapter One” centered above the start of the text.
- This is your one place to break from the default first-line indent rule at the very top: the first paragraph after a chapter title is sometimes left without an indent, though this varies by preference and isn’t a strict rule.
- From here, your manuscript format switches into standard mode — double spacing, 12 point Times New Roman, one-inch margins, and paragraph indents throughout.
Getting the title page and word count details right shows agents and editors that you understand novel manuscript format from the very first glance — long before they start reading your actual story.
Scene Breaks, Asterisk Use, and Page Break Best Practices
Knowing how to signal a new scene, a new chapter, or a shift in perspective is one of the more nuanced parts of novel manuscript format — and getting it right makes your story significantly easier to read. This section of the novel manuscript format guide covers exactly how to handle those transitions cleanly.
- What is a scene break, and why do you need one?
- A scene break marks a shift within a chapter — a jump in time, location, or point of view — without starting an entirely new chapter.
- Without a clear scene break, readers (and editors) can get disoriented by a sudden change with no visual cue that something has shifted.
- Scene breaks are a core part of standard format, and skipping them or marking them inconsistently is a common formatting mistake among new writers.
- How to format a scene break.
- The most widely accepted method is to leave a blank line between the last paragraph of the old scene and the first paragraph of the new one.
- Because a blank line alone can sometimes be missed — especially if the break falls at the bottom or top of a page — many writers add a centered asterisk (or three asterisks, sometimes written as
* * *) on that blank line to make the scene break unmistakable. - Whichever method you choose, apply it consistently across your entire manuscript. Mixing blank lines in some places and asterisks in others creates confusion.
- Center the asterisk on its own line, matching your standard font and font size — don’t bold it, enlarge it, or add decorative elements.
- When to use a page break instead.
- A page break is reserved for bigger transitions — most notably, the start of a new chapter.
- Every new chapter should begin on a new page, never partway down an existing page. This is achieved with an actual page break command (in Microsoft Word, Insert > Page Break, or Ctrl+Enter), not by hitting enter repeatedly to push text down.
- Using a true page break rather than manual line breaks ensures your formatting holds up even if the manuscript is opened in a different word processor or converted to another file type — manually created “breaks” using multiple enter keys can shift or break entirely when the document is reformatted.
- Formatting your chapter title and chapter number.
- At the top of each new page for a new chapter, center your chapter title or chapter number — for example, “Chapter One” or simply “One” — a few lines down from the top margin.
- Keep the chapter title formatting consistent throughout your entire manuscript: same font, same size, same placement.
- Some writers add a small amount of extra space between the chapter title and the first paragraph of text — this is acceptable as long as it’s applied consistently.
- Common mistakes with scene breaks and page breaks.
- Forgetting to mark a scene break at all, leaving readers confused about a sudden shift in time or perspective.
- Using inconsistent symbols for scene breaks — some chapters with asterisks, others with just blank lines, others with random symbols like tildes or hash marks.
- Manually forcing a new chapter onto a new page with multiple line spaces instead of a real page break, which can cause pagination issues later.
- Adding decorative formatting (bold, italics, larger fonts) to scene break markers, which isn’t standard format and can look unprofessional in a submission.
- Why this all matters for a smooth reading experience.
- Clear, consistent scene breaks and page breaks make your manuscript format easier to follow for anyone reading it — agents, editors, beta readers, or eventually, readers of your published book.
- These small formatting choices might seem minor, but they reflect the same attention to detail that a well-edited, polished novel requires. A manuscript that handles new scene and new chapter transitions cleanly signals that the writer understands not just storytelling, but presentation.
How to Format a Book for Submission to Agents and Publishers
Once your manuscript follows the standard format basics, it’s time to prepare it specifically for submission. This is where novel manuscript format really counts, since agents and editors will judge your professionalism based on how closely you follow their guidelines. Getting your novel manuscript format right at this stage can make the difference between a request for pages and a form rejection.
- Always check individual submission guidelines first.
- Every literary agent, agency, or publisher may have slightly different formatting guidelines, and these should always take priority over general standard format advice.
- Submission guidelines are usually posted on an agency’s website or included in a market listing — read them carefully before you submit your manuscript, and follow them exactly.
- If a specific guideline conflicts with general industry norms, follow the specific instruction. Literary agents are telling you exactly what they want to see, and ignoring that in favor of a generic formatting guide can hurt your chances.
- Format your header correctly.
- Most submission guidelines call for a running header on every page (except the title page) that includes your author name, novel title, and page number.
- A typical format looks like: Author Name / Novel Title / Page #, placed in the upper right or upper left corner, depending on the specific request.
- Keep this header in the same font and font size as the rest of your manuscript, and make sure it’s set up using your word processor’s header function rather than typed manually onto each page — a manual header will misalign the moment your page count shifts during editing.
- Page numbers matter more than you’d think.
- Number every page except the title page, and place page numbers in the upper right or upper left corner (again, check individual submission guidelines, since placement preference varies).
- Automatic pagination through your word processor is essential here. In a Word document, this is set through Insert > Page Number, ensuring the numbering updates automatically as your manuscript grows or shrinks during edits.
- Consistent page numbers help agents and editors keep track of where they are, especially when providing feedback or requesting revisions to specific pages.
- Know your file type expectations.
- Most literary agents and publishers request a Word document (.doc or .docx) for submissions, since this is the industry standard for editing and markup.
- Avoid submitting a PDF unless specifically requested — PDFs are harder to edit and don’t allow agents or editors to add comments or track changes.
- Always double-check submission guidelines for the exact file type requested; some agencies have specific naming conventions for the file itself, often including your novel title and author name.
- Prepare a clean first page and opening chapter.
- Many literary agents request only a partial manuscript initially — often the first few pages, the first chapter, or the first 50 pages — so make sure your opening follows the same rigorous formatting guidelines as your entire manuscript.
- The first page should include your chapter title, properly centered, followed by double-spaced text in standard font and font size, with correct paragraph indents throughout.
- Because this is often the very first impression an agent gets of your writing, formatting mistakes here are especially costly — inconsistent fonts, missing indents, or incorrect spacing can distract from even the strongest opening line.
- Understand the connection between the query and the manuscript.
- Your formatted manuscript typically accompanies a query letter, which briefly introduces your novel, your word count, your genre, and a short synopsis.
- While the query itself isn’t part of the manuscript format guidelines, it’s often submitted alongside your opening pages, so both need to reflect the same level of professionalism and polish.
- Some agents request the manuscript pages be pasted directly into the body of an email rather than sent as an attachment — in these cases, simplify your formatting slightly, since email programs won’t preserve indents or double spacing perfectly, but keep paragraph breaks clear.
- Common submission formatting mistakes to avoid.
- Ignoring specific submission guidelines in favor of generic “standard format” habits.
- Sending the wrong file type, or a file that hasn’t been proofread for lingering formatting inconsistencies (mixed fonts, incorrect margins, uneven spacing).
- Failing to include page numbers or a proper header, making it difficult for an agent to reference specific parts of your manuscript.
- Forgetting to update your word count on the title page after revisions — always double check this number matches your finished draft before you submit your manuscript.
- Why this level of care pays off.
- Agents and editors read an enormous volume of submissions, and a manuscript that follows submission guidelines precisely, is properly double-spaced, uses correct fonts, and includes accurate page numbers, immediately reads as more professional.
- Following industry standard formatting doesn’t guarantee acceptance, but ignoring it can guarantee rejection before your story is even given a fair chance. Getting your novel manuscript format right is one of the simplest, most controllable steps you can take on the road toward traditional publication.
Novel Manuscript Format for Self-Publish and Typesetting
If you’re planning to self-publish rather than submit to agents and publishers, you might wonder whether novel manuscript format still matters. The short answer is yes — though the reasons and the next steps look a little different. Understanding novel manuscript format is just as valuable for self-published authors as it is for those pursuing a traditional deal.
- Manuscript format still comes first, even if you’re skipping agents.
- Even without submission guidelines to follow, writing and editing in standard format keeps your manuscript clean, consistent, and easy to work with.
- A properly formatted Word document, double-spaced with correct indentation and consistent fonts, is far easier for you, a hired editor, or beta readers to review and mark up than a document with inconsistent, ad hoc formatting.
- Think of manuscript format as your working format — the version built for editing, not for reading on a bookshelf.
- Typesetting is the next step after your manuscript is finished.
- Typesetting is the process of transforming your finished, edited manuscript into the layout of an actual published book — the version readers will see, whether in print or as an e-book.
- This is where your novel manuscript format gets replaced with book-specific design choices: different fonts (sometimes still serif fonts, sometimes a specialty typeface), adjusted line spacing, decorative chapter openings, and running headers that look different from your submission-ready manuscript.
- Typesetting also introduces elements not found in a manuscript, like a proper table of contents, a copyright page, dedication, and other front matter typically added right before publication.
- What changes between manuscript format and a typeset, published book.
- Double spacing disappears — published books use single spacing with slightly larger space between lines for readability, not the wide double space used during editing.
- Page breaks are recalculated entirely based on the final trim size and font choices, so your page count in manuscript format won’t match your page count in the finished book.
- Scene breaks may be re-styled with a decorative symbol or ornament instead of a simple asterisk, matching the visual identity of your published book.
- Chapter titles often get custom styling — larger fonts, decorative elements, or drop caps — replacing the plain, centered chapter title used in manuscript format.
- Should you do your own typesetting, or hire it out?
- Software like Vellum, Atticus, or even advanced templates in Microsoft Word can help self-published authors typeset their own books, especially for straightforward fiction layouts.
- Hiring a professional typesetter ensures a polished result that matches industry standard expectations for a published book, particularly important if you want your self-published novel to look and feel like something readers would find from a traditional publisher.
- Either way, always start from a clean, correctly formatted manuscript — trying to typeset a document that’s still full of formatting inconsistencies from the drafting stage only creates more work later.
- A free template can simplify the whole process.
- Many websites offer a free template for novel manuscript format, pre-built with the correct font, font size, margins, and indentation already set up — a useful starting point whether you’re planning to query agents or self-publish.
- Using a formatting guide or template from the start of your writing process means you won’t need to reformat your entire manuscript later, saving significant time before submission or before moving into typesetting.
- Final best practices before you move forward.
- Proofread your entire manuscript one more time after finalizing your format — formatting changes can sometimes shift line breaks or introduce small inconsistencies.
- Whether you’re preparing to submit your manuscript to agents and publishers or getting ready to self-publish and typeset your own book, starting with a clean, correctly formatted manuscript sets you up for a smoother process at every stage that follows.
- Novel manuscript format isn’t just a technical hurdle — it’s the foundation that makes everything from editing to submission to typesetting go more smoothly, letting your story reach readers looking the way it deserves to look.
- Purdue University Online Writing Lab (OWL) – Research and Manuscript Writing Resources – https://owl.purdue.edu/owl/research_and_citation/resources.html
- University of Washington Writing Center – Academic Writing and Research Papers Guide – https://www.writingcenter.uw.edu/
- Massachusetts Institute of Technology (MIT) Writing and Communication Center – Scientific and Academic Writing Support – https://writing.mit.edu/wcc